Table of Contents
There are a few reasons your pictures aren’t wowing pundits or winning photograph grants. The majority of them are exceptionally simple to fix.
Assessing your pictures before you leave an area is an excellent method to help fix terrible photographs. At that point, you, at any rate, will have another go at it. For any remaining mysteries to choose awful pictures, read beneath.
Secret Editing Tips To Fix Your Bad Photos

01.Use Composition to Add Interest to Your Images
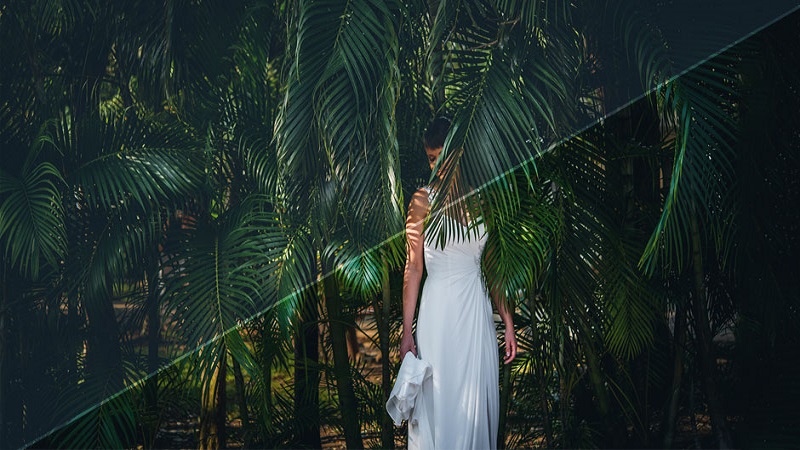
The organization is quite possibly the essential thought behind photography. It is additionally quite possibly the main regions that numerous photographic artists ignore. They believe that by snapping ceaselessly and catching the scene with no thinking ahead, it’s adequate.
It may work for narrative picture takers set in struggle zones. However, the vast majority of us aren’t. Most picture takers don’t just discover energizing, exciting, and atmospheric scenes. We need to work with what we are given.
Syntheses help our cause a ruckus seriously intriguing. We have all seen a large number of pictures taken at the seashore. Note; keep in mind our valuable secret tips on how to Fix Your Bad Photos and bookmark this page.
The ones that stand apart have something unique from them. For the most part, it will be the piece that transforms an awful picture into a decent one.
Creation is utilized well when you can’t advise it was a thought in the photographic artist’s psyche. Unpretentious ideas are awesome. For instance, while catching a scene, go for the standard of thirds.
02.Reflect the Light Temperature Through White Balance
White equilibrium is vital, particularly when you need your pictures to mirror a practical climate. To guarantee that the whites will be whites, ensure you utilize the correct setting for the light you are working with.
Each light source has an alternate temperature. The sun is hotter than moonlight, which is likewise more liberal than a reasonable blue sky. This adjustment of weather you should represent.
Most novice or specialist picture takers will go for Automatic White Balance (AWB). It may permit you to take a photo without considering your scene. Notwithstanding, it will not give you the best and most practical shading cast.
You can pick between Tungsten, Fluorescent, Daylight, Cloudy, Shade, and Flash in your camera settings. By utilizing a climate that mirrors the light temperature as close as potential methods, a superior-looking picture.
This is particularly evident on the off chance that you are capturing in jpg. For crude pictures, post-handling programming, for example, Lightroom, will permit you to mess with the picture’s White Balance sometime later.
03.Use Exposure Compensation
Openness remuneration is certifiably not another element inside photography. However, numerous photographic artists disregard it. Possibly they don’t realize it exists or don’t have the foggiest idea of how it functions.
Openness pay is conceivable when you photo in any self-loader camera setting, like gap or screen need. This scale permits you to change the openness in your scene.
It is the best way to do as such, as to change any settings that would constrain the camera to meter the scene similarly.
Manual mode doesn’t permit openness pay. To change a setting here doesn’t remember your scene. The openness remuneration scale runs from ‘- 3’ to ‘+3’, and five steady stops in the middle. Your camera is set to ‘0’ naturally.
04.Change Your Perspective for More Varied Pictures
Numerous photographic artists never consider their viewpoint when they catch a scene. They hold the camera out before them, at eye level, and snap away.
We as a whole see the world like this, and it isn’t especially intriguing.
There are numerous scenes that we constantly see throughout every day. These scenes need more interest, and adjusting our viewpoint is only one way we can do this.
Doing so permits individuals to rethink basic scenes. Note; keep in mind our valuable secret tips on how to Fix Your Bad Photos and bookmark this page.
Get on the ground and give us a worms’ eye view. Or then again, get above and kill, showing an elevated perspective. Showing a climate helps fix terrible photographs. Be inventive and evaluate alternate points of view.
05.Use Metering Modes to Capture the Best Light
The settings will assist you with picking your shooting choice. It would be ideal on the off chance that you considered your scene and what your subjects are doing.
Attempting to take a photo in a low light setting with a low ISO and a lethargic shade will require a stand to stop the camera shake.
Additionally, capturing a moving game vehicle with an opening need will bring about foggy, unfocused pictures.
To help you fix terrible photographs, ensure you comprehend what every camera mode is for and what it does. Note; keep in mind our valuable secret tips on how to Fix Your Bad Photos and bookmark this page.
Use gap when you are confronted with subjects that don’t move. Screen speed will permit you to pick the shade speed, where the camera will set the gap in like manner.
Metering modes are additionally significant in catching the best light for your scene or subject. Utilizing the correct strategies will guarantee extraordinary photographs and will save considerable time shooting and altering.
06.How to Fix Blurry Images
We as a whole do it, and a few of us probably won’t see how it is possible to return home and see numerous foggy pictures. Note; keep in mind our valuable secret tips on how to Fix Your Bad Photos and bookmark this page.
Our shoot from prior on in the day may be demolished. However, it may furnish you with information guaranteeing you never endure it again.
There are numerous reasons why your pictures may be foggy. Here is a couple of them:
Your screen speed is excessively sluggish. As a rule, your screen speed ought to be equivalent to or over the central length of the focal point you are utilizing. Assuming you have an 85 mm prime focal point, you’ll need to use anything around 1/60th of a second. With a stand and shade discharge link, you can utilize any screen speed.
You didn’t concentrate as expected. Wide openings can be hard to utilize. A hole of f/1.4 gives excellent bokeh, yet it isn’t easy to use due to the crawl of the profundity of field. Your central region will be mm, which is a battle to utilize, particularly in low light areas or moving subjects. Open the gap and give your subject a bigger profundity of the field to work with it.
It might be ideal on the off chance that you adjusted your focal point. Centering issues should show you a couple of foggy pictures. On the off chance that all of your photographs are foggy, you may have to adjust your focal point. Regardless of which focal point you get, it probably won’t be completely changed to your camera model. Peruse our Lens Calibration article for more data.
07.Avoid Excessive Post-Processing for a Natural Look
High Dynamic Range (HDR) pictures are, for the most part, terrible. It is because they are route over-prepared, giving the scenes an exceptionally dreamlike and recognizable look. If your style requests over-handling, that is fine.
A painter realizes that to quit applying paint is similarly pretty much as significant as when to begin. It is something very similar for photographic artists. Note; keep in mind our valuable secret tips on how to Fix Your Bad Photos and bookmark this page.
Post-preparing programming, like Lightroom, can be significant in changing a couple of settings. You can utilize an excess of clearness, immersion, or dynamic quality that can hurt your pictures. You need individuals to take a gander at your work and go ‘Goodness!’ and not ‘gracious, amazing’. If you experience difficulties trying to improve your photos, you can always order outsource retouching services and have your images edited by pros.
08.Choose Lighting Conditions to Reflect the Mood of Your Image
Lighting is the main region in photography to get right. Without good light, your pictures will be dull and level. The lighting you will utilize will rely upon your scene, what light is accessible, and the style you need to accomplish. A few picture takers favor normal light and shoot outside or close to windows.
Others like to control the light and shoot with streak units, strobes, or studio hardware. Whatever you use, guarantee the light isn’t too solid that it smothers your features. The light should be sufficient. Else, you’ll discover your picture is underexposed. Powerful lighting can represent the moment of truth in a photograph. Note; keep in mind our valuable secret tips on how to Fix Your Bad Photos and bookmark this page. The greatest point here is that lighting can be innovative and tackled from various perspectives.
Clipping path benefits at Clipping Path Specialist

Since most distributing programming manages everything far removed of cutting, this is useful for visual architects. It is because it works for them. They can toss your item photographs against some other picture or foundation without managing a white foundation. Aside from these, it permits the content to wind against the first item.
Clipping path Service specialists provide services:
- Clipping path
- Background removal
- Image masking
- Drop shadow
- Ghost mannequin
I would say this is against the limits of your rectangular picture. If you intend to keep some print material, the cut-out way is significantly more fundamental for you. It incorporates photographs of your items in a magazine and list. Additionally, a solitary picture results from numerous courses in the photograph business for various things with colors. Note; keep in mind our valuable secret tips on how to Fix Your Bad Photos and bookmark this page.!!
Read more: How To Optimize Images For Google Image Search SEO?


